Stop Motion Handbook 3
Craig Lauridsen
© 2012 Craig Lauridsen
Acumen
19 Trevor Terrace, Newtown
Wellington 6021
New Zealand
ISBN 978-0-473-22246-8
The website for this book is stop-motion-handbook.com
Go to the website to: BUY a printed copy (ISBN 978-0-473-22245-1), BUY the iStopMotion software, ENQUIRE about volume licensing for this epub or CONTACT the author.
For information on creating stop motion entirely on an iPad go to ipadanimation.net
Notice of Rights
This material is the property of the author and cannot be reproduced in any form without the written permission of the writer. Contact the writer at smbook@acumen.net.nz
Notice of Liability
The information in this book is distributed on an ‘As Is’ basis without warranty. While every precaution has been taken in the preparation of this book the author has no liability to any person or entity with respect to loss or damage caused or alleged to be caused directly or indirectly by the instructions contained in this book, or by the computer software and hardware products described in it.
Trademarks
GarageBand, iMovie, iPhoto, iTunes, iPod, iPhone and iPad are trademarks of Apple Inc., registered in the US and other countries.
Boinx and iStopMotion are trademarks of Boinx Software Ltd.
Lego is a trademark of The LEGO Group.
Plasticine is a trademark of Flair Leisure Products plc.
Average Joe is property of Newtown Movie School.
Fast track the learning curve to making your own stop motion movies. It’s fun, it’s crazy, it’s addictive. The Stop Motion Handbook leads you through simple and robust processes, helping both beginner and amateur animators make good decisions when creating stop motion.
As you learn how to avoid numerous common mistakes, your first movies will have the quality of a more seasoned movie maker. This is a great guide for teachers, parents, children and amateur movie makers, or anyone who wants to produce their own stop motion.
Learn key competencies across a broad range of learning areas:
This book is an accessible reference resource; read it cover to cover, or dive into a specific topic and work through the step by step guidelines. While the book covers many universal principles of stop motion, the step by step examples refer to iStopMotion www.boinx.com and GarageBand and iMovie www.apple.com – all Mac software.
Many of the stop motion examples in this book have been produced by children so are easily accessible and affordable.
The Newtown Movie School provides fully interactive stop motion movie making workshops for children. This book is our reference guide, published to assist young animators and teachers worldwide.
Craig Lauridsen
These people have been integral in bringing this book to reality.
Jamin Vollebregt – the last few years with Newtown Movie School have been a great movie making adventure with you. You’ve been there from the beginning. Your creative and practical ideas have given many kids incredible movie making experiences and helped to develop this book into a unique educational reference.
Mae Manalansan – for a thousand and one support tasks from clearcutting images to converting this book to the EPUB version.
Tino Tezel and Sarah Schwaiger from Boinx – for coming on board with your encouragement. It is always easier to do things with a team behind you.
James, Fiona and Tane Hippolite, Al Kinley and Inshirah Mahal – for putting their hands up as proofreaders and giving a wide range of valuable feedback.
Malcolm Shearer – for your meticulous proofing of all the software instructions at a point when I couldn’t see the wood for the trees and needed a fresh set of eyes.
Teachers Ben Gittos, Sarah Taverner, Kelvin Harper, Kirsty Stewart, Hilary Hague and Principal Sandra McCallum – for your feedback on using this book in schools.
Ian Adams – for your cover and page design. As always, a fabulous job.
Ros Jaquiery – for meticulous proofing of so many versions.
And lastly, thank you to the B-SMART team (Brayden, Sara, Matthew, Amy, Reuben and Theo) and all the children who have attended Newtown Movie School and given insight and feedback about the best ways to make stop motion movies.
Craig
Conventions
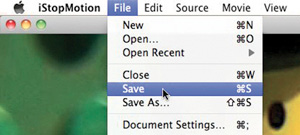
This handbook gives direct instruction for using computer software. References such as ‘File>Save’ mean go to the ‘File’ menu and choose ‘Save’ from the drop down list.
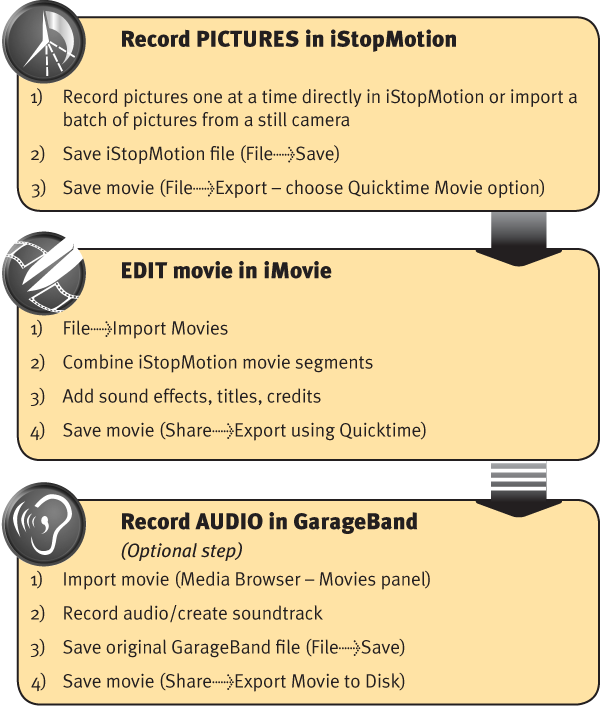
Stop motion is a movie made from a series of individual pictures. When the pictures are viewed one after the other, our eyes are ‘tricked’ into thinking that the objects in the pictures are moving. This is the magic of stop motion.
In this book, we use iStopMotion software www.boinx.com and Apple’s GarageBand and iMovie software www.apple.com to make stop motion.
This Quick start chapter is written for those who just want to dive in and get started. If you want more detail, follow the links to the appropriate sections.
This chapter outlines two processes to make stop motion:
The last part of this chapter is a summary of the vital keys for a high quality movie. These are expanded more fully in the rest of this book.
The best way to make stop motion is to create the soundtrack first, then record the pictures to match. As you record the pictures you’ll be able to hear and ‘see’ the soundtrack so you can confidently record the right number of pictures and achieve perfect alignment between character movements and the sounds.


Links
In some stop motion, eg time lapse, picture montage or slideshow, the pictures can be recorded first. The audio, often a voice-over narrative, or music, can be added later as it is not likely to be timing specific. Here is an outline of a process to record the pictures first.
Links
Of all the tips to make better quality stop motion, these first two tips – we call them ‘rules’, will make the most difference.
Rule 1 – Secure the camera on a tripod or mount and DON’T MOVE IT. Move only your characters around on the stage. Moving the camera too often may produce a movie that is very jumpy, confusing and hard to watch link
Rule 2 – MOVE THE CAMERA to a new and very different angle for a new scene, line of dialogue or action. Each camera movement should help the audience to follow the story and get more involved in the action link
A story needs to be about something. Try this prompt to get started: ‘What might happen if…?’ link
Write a script and record the soundtrack first. Then record the pictures to match link
If the sound is clear, your audience will think the picture quality is better than it is. So, invest in better sound equipment and learn better recording techniques before you buy a better camera link
Use your fingers to mime the actions to help record the right timing between lines of dialogue link
Reduce the distance between the microphone and the sound source to increase the sound level in relation to the surrounding noises link
When recording the audio, find a quiet room and turn off all background noises link
Have voice actors stand so they have better voice control link
Voice actors need to take care with pronunciation. Record the audio again if you hear words that run together or where the diction is not clear link
Use the Editor window to make precise editing in GarageBand. The more unwanted sounds and noise you can remove from clips, the cleaner the soundtrack will be link
Keep your hands clean when working with Plasticine link
Secure all props and backgrounds, including Lego base boards, so they can’t accidentally move link
Curve a large piece of card as a one-piece stage background and base to create a stage with an invisible horizon line link
Regularly check the arrangement of the characters, props and camera position for good composition link
Position the camera so that the character’s eyes are one third down the screen and you’re a long way towards having good composition link
Use the title safe grid to keep characters away from the edge of the screen link
To make your movie look more like a ‘film’ (characters are sharp and in focus but the background is blurry) position characters as far in front of the background as possible and set your camera to manual focus link
Turn off your camera’s image stabiliser, if it has one, as it can attempt to move the image alignment link
Check camera settings such as exposure and white balance link and link
Use a ‘close-up’ or macro lens for close-up pictures link and link
Securely fix the tripod or camera mount and do whatever you can to avoid accidentally moving it link
Control all lighting sources including blocking out windows. Use appropriate artificial lights with dimmers, diffusers and bounce boards to get soft and even lighting link
When you are learning, reduce the picture rate to 12 pictures (frames) per second (FPS). It will still give realistic motion and really speeds up the time to make your movies (normal speed is 25 FPS) link
Make sure iStopMotion’s Autosave feature is on link
Characters that are speaking should move – keep all other characters still link
Wait until everyone is clear of your stage and lights before recording each picture so that you won’t get hands or unwanted shadows in the shot link
When editing in iMovie, create a project with the same picture size and aspect ratio as your iStopMotion movie link
The chapters in this book cover:
Stop motion falls into three general categories:
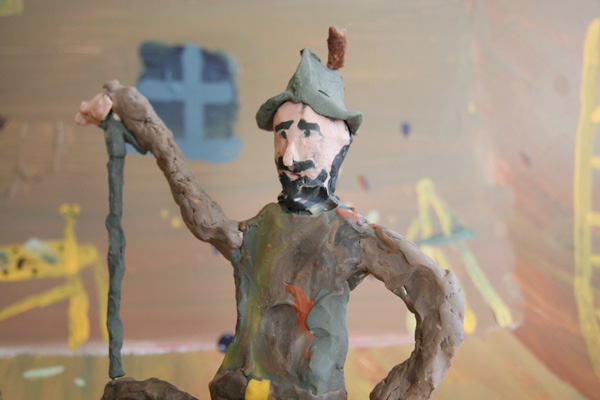
Probably the most traditional and best known medium for stop motion animation is clay animation or claymation (we use Plasticine from an art supply shop).
Plasticine can be moulded and shaped into anything your imagination can come up with.
There are two main types of claymation figures:
In most situations you’ll want to mould 3D figures which stand upright, can make reasonable movements and stay balanced. You can also make 2D Plasticine figures which lie flat on painted backdrops see Flat 2D art
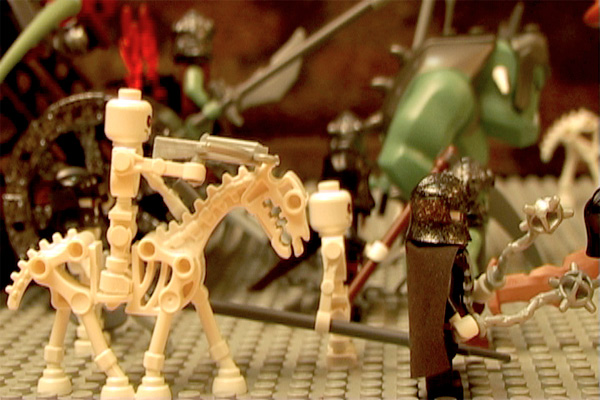
Lego is a great resource for creating stop motion because a huge range of figures and props are readily available in the same scale. Lego figures are more robust than Plasticine and won’t squash, smudge or break in your hand. They can make some movements, but not as many as Plasticine.
Almost anything can be used to make stop motion – whiteboards, coloured paper cutouts, toys, furniture, plants, artwork or even people.
Search Google or YouTube for ‘stop motion’ and you’ll see some very innovative examples of what other people have done. In the picture below a group of children are driving around the room on chairs.
To make stop motion you’ll need:
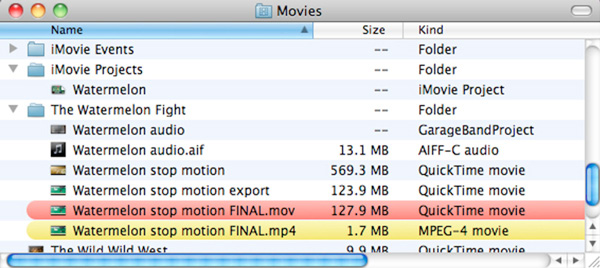
In the process of making a stop motion you could create a large number of files:
It is easier and tidier if, from the start, you have a file storage and naming system that clearly identifies all the files associated with the project: