Materials
Cockpit • Exhaust nozzles • Other detailing • Weathering
The kit • The cockpit • The ejector seats • The main build • Aires afterburner cans • Preparing the kit • Paint scheme • Decals • Finishing off
Cockpit detail • Extra detailing • Spraying and decals
The kit • The cockpit • The fuse lage • Afterburners • Undercarriage • Wheels Weapons • F-4J colours • Decals • Weathering and panel lines
The kit • The cockpit • Vulcan cannon • Radar AN/APQ-120 • Cutting Edge wing conversion • Hellenic F-4E colour scheme • Decals • Bare metal areas • Final fling
Creating realistic metallic areas on your F-4 • Using pastel chalks for weathering • Creating a realistic hard-standing for your F-4 • Photographing your scale models
F-4 Phantom websites
F-4 Phantom II kit chart • 1/72 and 1/144 scales • 1/48 scale • 1/32 scale
by Archie Liggat, former RAF squadron and display pilot
My association with the McDonnell Douglas F-4 Phantom II began in April 1986 at 228 Operational Conversion Unit (OCU) Coningsby. The FGR.2 was an intimidating beast to get to grips with and I treated her tentatively for many hours. She was honest but extremely demanding and never stopped chatting to her pilot, frequently reminding them of her many aerodynamic idiosyncrasies. Many of her musings were gentle warnings so that those who sought to extract maximum performance had to listen carefully and coax her along with a deft touch. There were no arguments; she could abruptly stop flying if pushed too far. Teamwork was everything with the F-4, both between front and back seats and between man and machine. I have never flown an aircraft with so much character nor one whose operation led to such extraordinary satisfaction.
Next came 111(F) Squadron at Leuchars, equipped with the quirky ex-Navy FG.1, full of carrier mods but no battery! The joy of low-level practice intercepts amongst the Western Isles of Scotland on glorious summer evenings will remain with me always. An ex-QFI (Qualified Weapons Instructor), I soon found myself in the back of our homemade two-sticker. From the rear seat, the forward view was dire (I prayed for a cross-wind on the approach) and the cockpit ergonomics made for a frightful instrument scan. The OCU had now joined us at Leuchars and there I went to work hard, either intensive instruction from the back or teaching intercepts to navigators from the front. Here, the basic airframe strength of the F-4 became apparent. Gross over-stresses were not uncommon but the sturdy, empirically designed airframe shrugged off abuse. Now a member of Standards Flight, I checked out on the F-4J. This was a fundamentally different machine, lower in thrust and acceleration but ultimately faster and perhaps smoother than the British version – and with a superb radar.
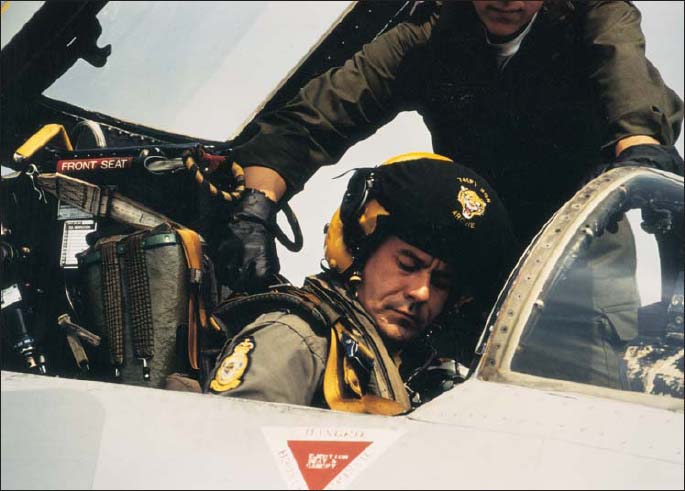
Archie Liggat, RAF Phantom display pilot, straps into his 74 Sqn FGR.2 for another ‘8g performance’ to thrill the crowd. (AL)
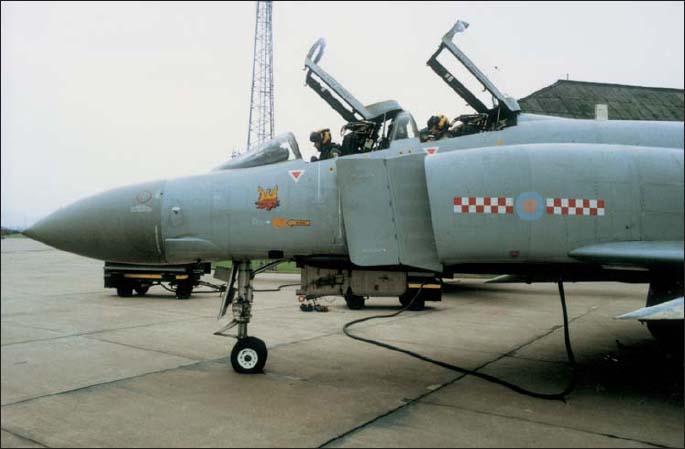
Archie Liggat in the front office and navigator Mark ‘Manners’ Mainwaring, nearly ready for the off. Note the aircraft is connected to a Houchin ground power unit. (AL)
Finally, to 74(F) Squadron at Wattisham. Here in 1992, I displayed the FGR.2 for her final season in the able company of Mark Mainwaring, who looked after me from the back. With no requirement to preserve fatigue life, I had a free hand. Low and clean, the F-4 could sustain 8g and we used it. She complained a lot, of course, shedding bits on occasion and always shaking the earth with her tantrums; but I had chalked up 1,500 hours with her by then and just about had the measure of the beast. I hope we provided a suitably spectacular send off for this remarkable aeroplane and a fitting tribute to those who lived and died with her.
Now, in the UK at least, the F-4 is no longer with us, but her spirit can be rekindled by those who follow this excellent book. I have built several FGR.2 models, in various scales, and have found that fully capturing the familiar but peculiar and subtle curvatures of the old lady does not come easy. I wish you success and hope that your efforts help sustain memories of a truly venerable and respected aircraft.
The F-4 Phantom II can certainly claim to be one of the most popular aircraft ever kitted by scale model manufacturers. At the time of writing, there are 25 models of the F-4 Phantom II available in the popular scales. From the early F-4B through to the later production F-4G, the modeller has a wide choice – good news for all who love this outstanding aircraft. Although there have always been models available in 1/72 and 1/48 scales, it has taken too long for this important aircraft to be produced as a quality product in the larger 1/32 scale. It is only in the last three or four years that the modeller has been able to buy truly outstanding models of the F-4C, D, J and E in this larger scale and these superkits produced by Tamiya are all, we’re pleased to say, covered in this book.
Fujimi of Japan have produced some of the best models of the F-4 in 1/72 scale but these are hard to come by these days. However, the most important manufacturer of F-4 scale models apart from Tamiya must be Hasegawa: its kits dominate the shelves of any good model shop when it comes to the Phantom. Again, this is no bad thing as the vast majority of Hasegawa’s offerings are well produced, featuring finely recessed panel lines and rivet detail. Cockpit detail is also generally good with fine raised detail that responds well to modelling techniques such as dry-brushing and the application of washes.
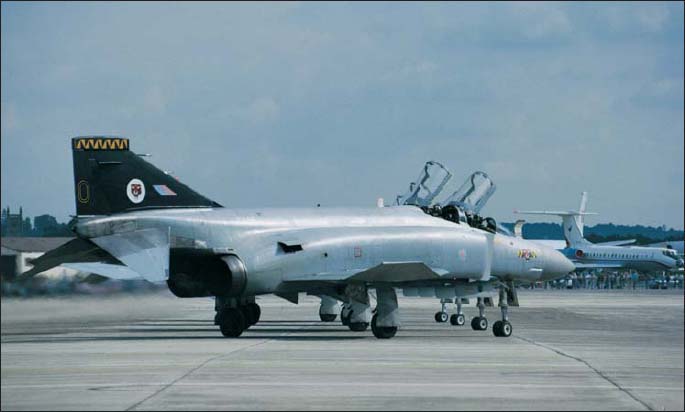
It was always frustrating that the significantly different Royal Navy and Royal Air Force F-4 Phantoms, the FG.1 and FGR.2 respectively, were unavailable in kit form. Fujimi came to the rescue in the 1980s to much joy and enthusiasm from the F-4 modelling fraternity. Perhaps the only slight disappointment was that they were only available in the small 1/72 scale. But, hey, the British Phantoms had at last been kitted! Sadly these excellent models are no longer available and the modeller has to look in the secondhand boxes at the many scale model events around the world to try to locate them. The good news is that Hasegawa have recently re-released their 1/48-scale versions of the British pair.
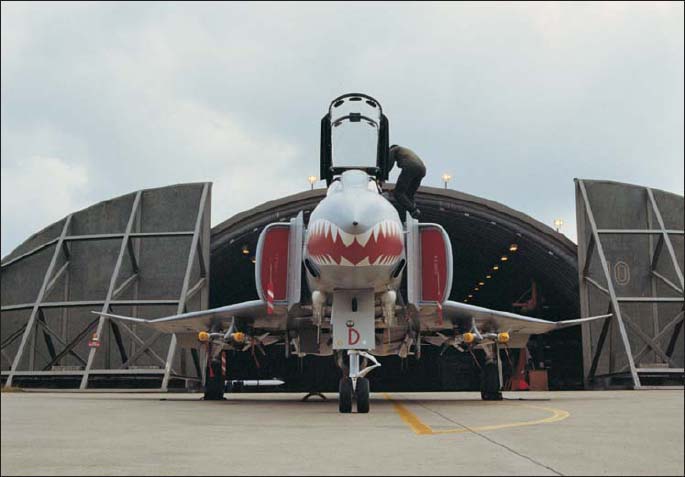
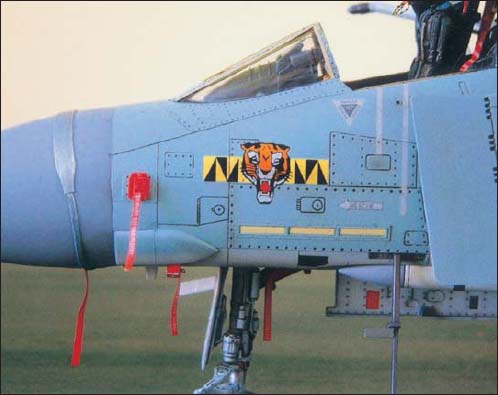
A ‘Shark mouth’ RAF FGR.2 of No.56 Sqn waits outside its HAS (Hardened Aircraft Shelter). (MA)
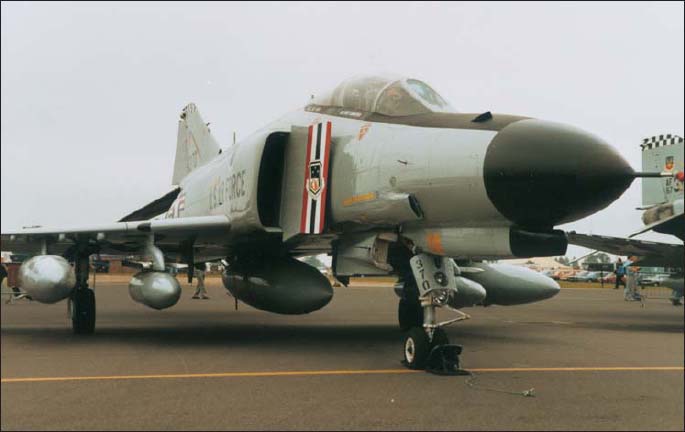
A rare sight indeed, a pair of US Air Force F-4Es from the 57th Fighter Interceptor Sqn, based at Keflavik Airbase, Iceland – seen here at the UK’s International Air Tattoo in July 1985. (GC)
An impressive line up of 74 Sqn FGR.2s. Note the satin finish so typical of operational F-4s and RAF machines in particular. A mix of Poly Scale Satin and matt varnish can recreate this. (MA)
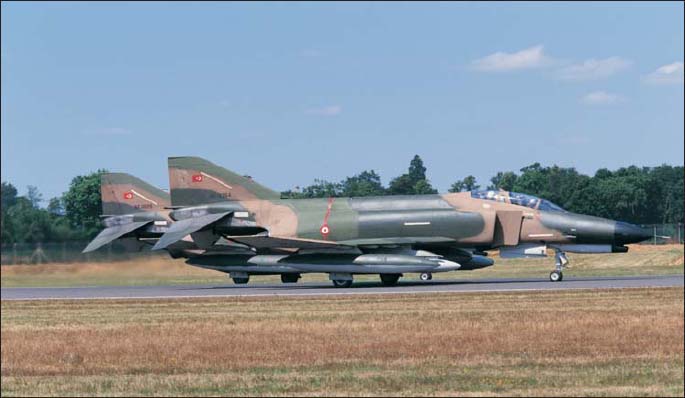
A pair of Turkish F4-Es about to depart from another air show – you can almost feel the power of their General Electric J79 power plants. (MA)
The latest and arguably the most impressive model of the F-4 ever produced by a manufacturer, the Tamiya F-4E in 1/32 scale, forms the centrepiece of this book. The Greek scheme represented is typical of the heavily-worn challenges open to the scale modeller and we just couldn’t resist putting everything into it. You’ll see what we mean later!
Many kits have come and gone, but we still have probably the best selection of F-4s currently available. If you have a big Phantom lurking in your loft, we hope you are inspired to get it down and start building. If you’re not a dedicated F-4 modeller, we hope this encourages you to start modelling the Phantom II – a legend in its lifetime.
One good thing about a book written by two authors is that the techniques and the materials used by both Geoff and Neil can be covered. Below is a list of the key tools and materials we used when constructing these F-4 models, to help you in your endeavours.
Safety equipment We have used a lot of resin and etched metal, so you’ll need a dust mask and eye protection to keep resin dust and small sharp metal items away from your face.
Knives It’s essential to have a variety of these. Geoff, for example, has at least three different scalpels on the go. Keep a new blade ready for very fine work, like trimming masking tape from canopies, and when you need to cut a very clean edge. We keep a general-use scalpel for cutting etched metal and other general tasks.
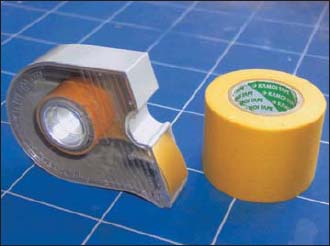
Tamiya masking tape is simply the best masking tape on the market for modellers: its low tack quality rarely lifts your fresh paintwork. (GC)
A hand-held pin-vice drill is ideal for creating the highly visible rivet detail seen on most F-4s. A 0.3mm bit is good for 1/48 scale and 0.35mm for 1/32. (GC)
Steel rules These are really useful for cutting masking tape accurately and, of course, measuring.
Masking tape The only one on the market that is top quality and never lets you down, and that we both use, is Tamiya tape. It is excellent for masking canopies and paintwork and is even reusable. You’ll see this tape in many of the photos in this book.
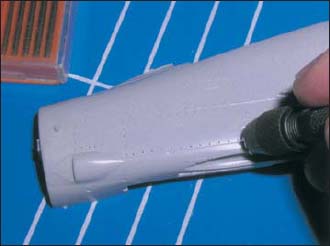
Hand-held pin-vice drill This is very useful for drilling out and remarking the rivets that are moulded into the plastic. The F-4 is covered in rivets and many of these show up on the real aircraft and need replicating in model form. A 0.3mm drill bit is usually ideal for quarter-scale and 1/32 scale. The FGR.2 is an ideal candidate for the drilling treatment: see the photographs for the effects you can create.
Files A set of rat-tail modeller’s files is essential. The round section file in particular is ideal for opening out holes in the wings and fuselage to take stores, pylons and ordnance.
Glues, adhesives and accelerator